
Kartbuilding Blog: Regular Tips & Information on Building Karts
I’ve always liked Popular Mechanics, from reading old copies which my Dad used to get (many years ago), to browsing their website. I’ve even blogged about articles from their website before, however this month’s article is especially cool!
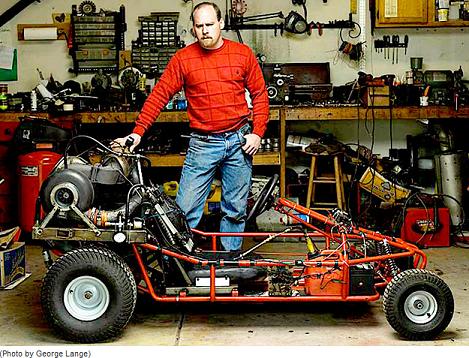
Original Image obtained from the Popular Mechanics Website.
Bryan, a 37 year old assistant manager at a Mitsubishi dealership devised this backyard invention complete from old parts and scrap metal! He got the power turbine on eBay and modded the rest himself. His total bill came to $1000 which might sound like a lot, however we do not know how much the turbine cost. The final kart weighing in at nearly 500lb reaches an astonishing 60mph in 8 seconds! There is a youtube video also available, showing the kart in action. It sure sounds loud! I bet the neighbours were giving out, it been late at night and all when they took the video 🙂
It seems that you can buy just about anything on eBaythese days. For kartbuilding, this is great news as odd parts and components can easily be sourced, however it can cost quite a bit if you have to pay for shipping. Most of the time, with some patience and looking in skips and yards etc. all the parts can be obtained for virtually nothing.
While the articleitself lacks a lot of inside information into the build, it provides great inspiration to many people looking to build karts from old pieces of scrap and second-hand parts. The popular mechanics website also provides great inspiration and a wealth of information on engines, motorbikes, chassis’s, brakes and just about everything that’s involved with kartbuilding. Hopefully the summer and go-kart building is going well for all of you.
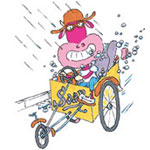 Looks like its too late to enter this years Red Bull Soapbox race in Belfast on May 25th, 2008. What a pity. Still the event itself should be a good laugh with plenty of ideas and soapbox carts/karts to see with 47 teams been given “Soap Box Racing licences”. The event seems planned very well, with plenty of information on the RedBull website, including details on brakes and steering!
Attending the race is free to the public, and as the teams are from all over Ireland/N.Ireland it’ll be well worth a visit.
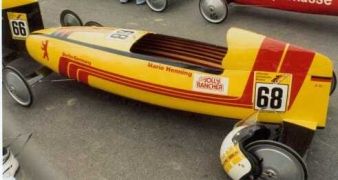 So, what is a Soap Box? They are simple vehicles which reply completely upon gravity. Typically they are raced together as part of a “Soap Box Derby” which is exactly what is happening with the Red Bull Soapbox race.
Keep the ideas and kartbuilding going!
EDIT:
Due to the interest and questions recieved about Red Bull Soapbox racing via email, some vidoes of previous races can be found on youtube. The following are two relevant ones. The first video shows part 1 of the construction of a soapbox racer. The second video shows one of the soapbox carts in action.
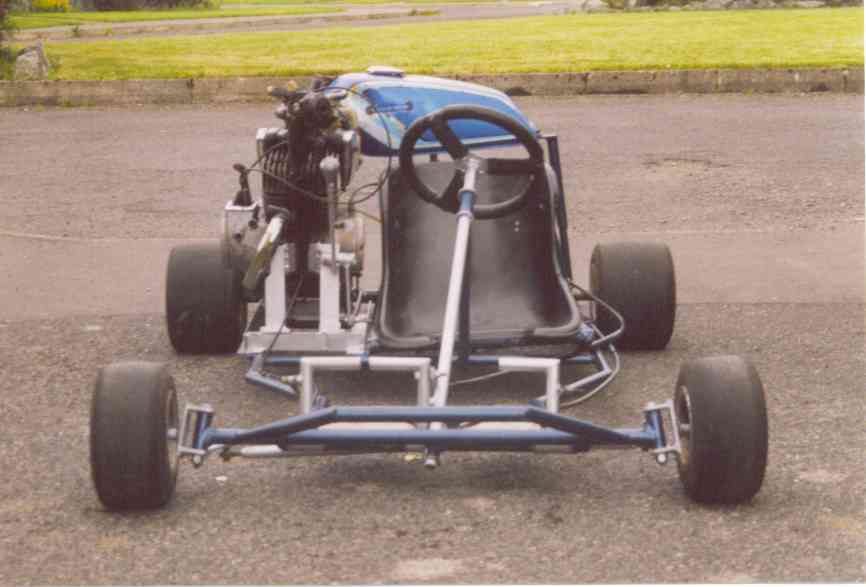
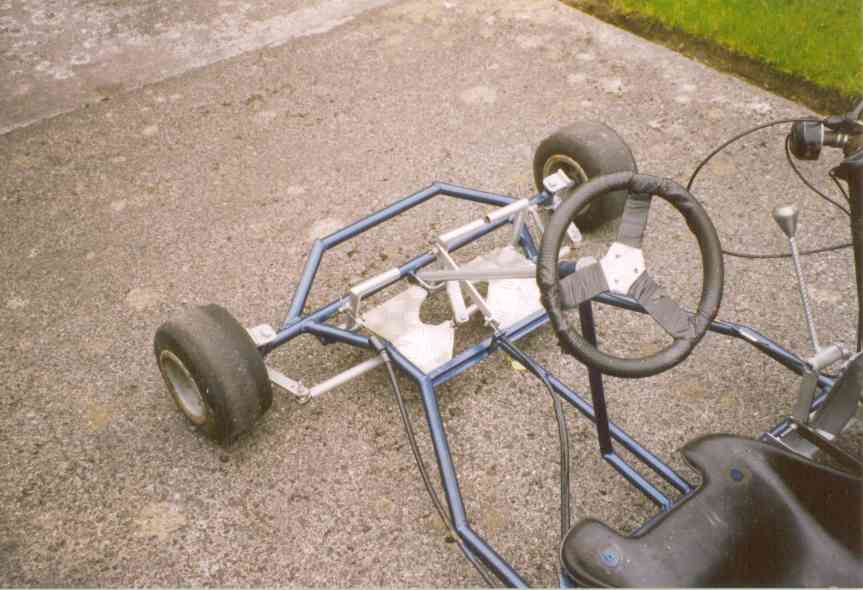
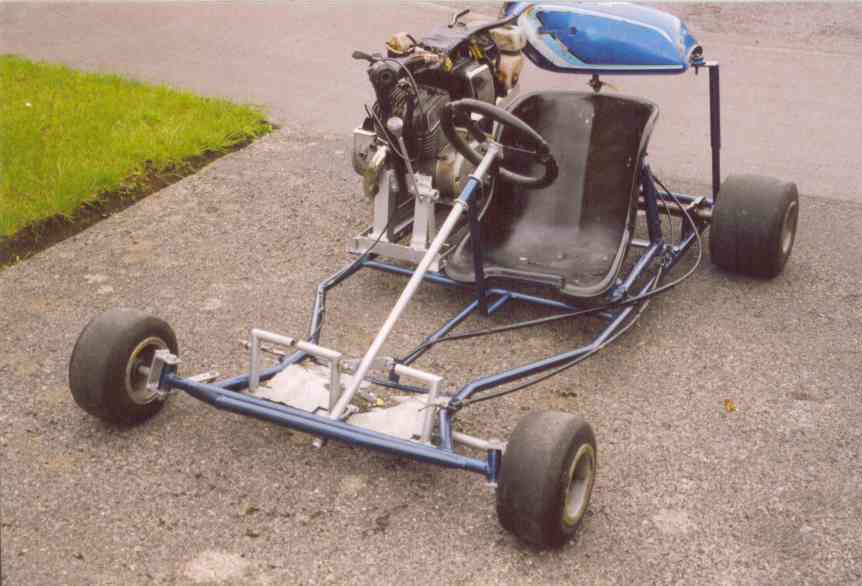
Apologies for not blogging here in quite a while. Behind the scenes more plans and material is been made. Below is a preview of plans for an off-road kart currently being drawn up. Full cutting lists and bills of materials will be created covering all aspects of building the off-road kart, using commonly available materials and parts. For example, for the seat below, which is a modified plastic chair with side reinforcements and padding, will be fully descibed with details on how to adapt it to suit. The wheels shown below are from a wheelbarrow! The idea of these kart plans is to provide details and information on making a low-cost, low-budget kart.
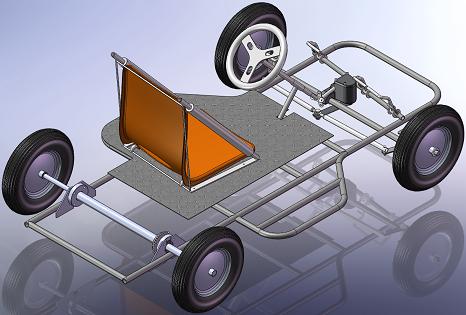
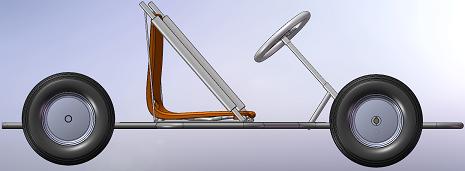
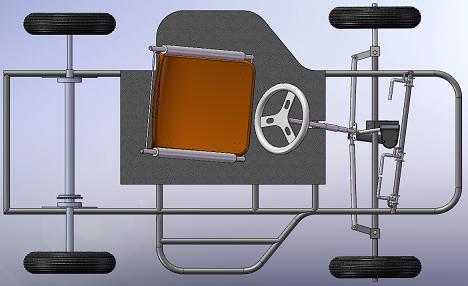
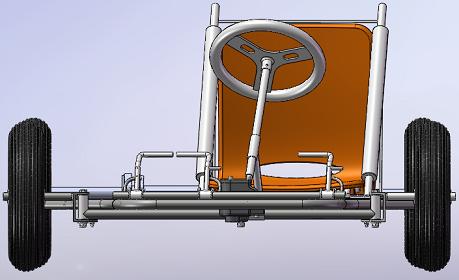
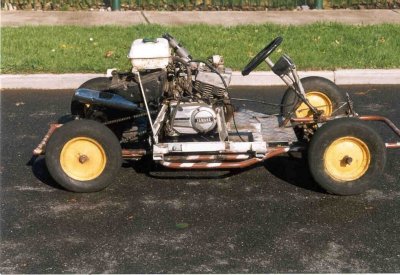
The plans being drawn will contain all the details and information of the the above kart (photo). It will be a few months however before the all the plans, details and information is fully completed for the above kart, so check back soon. If you have any ideas on what should be included in the Plans for this Off-Road Kart, please get in touch and let us know. ![]()
Stay tuned!

GoingKarting.co.uk: This website offers great tips and advice to help you get the most out of go-karting. There is some good general knowledge on karting, with all types of karts (pedal to petrol etc.) been covered for both young and old. It also has information on setting up a karting meeting.
Worth a look.
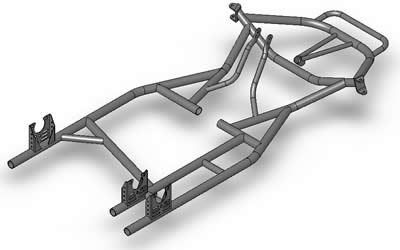
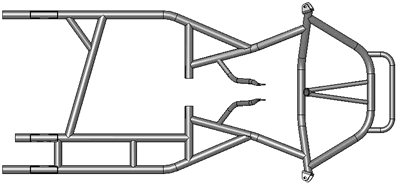
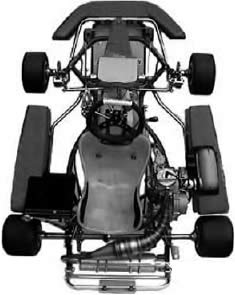
Tony Kart produces high quality racing kart chassis. A catalogue of their kart chassis can be found on their website. A particular chassis model, a Tony Kart Extreme ’97, was modelled using SolidWorks, and is available for download. Below is an overview of the chassis, in isometric and in a plan view.
This chassis is modelled perfectly in SolidWorks, with each member as an individual part and fully in-context. With the complete assembly and part files, it would be very easy to create 2d drawings of the chassis. The chassis is full size, so no scaling would have to be carried out.
Perhaps in the future the author will complete a fully dimensioned chassis using SolidWorks. Please contact the author if you have any queries etc. regarding this.
The SolidWorks assembly file can be downloaded from its original location here, along with some other CAD drawings also. A backup local copy of the SolidWorks chassis is also available.
In case you don’t have a copy of SolidWorks to open and measure the components, the eDrawings viewer can be used to open the chassis, measure each component, and create a section view through the chassis. The chassis opened in eDrawings can be seen below:
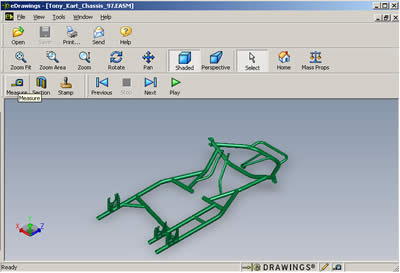
Download the Tony Kart Chassis ’97 eDrawing
Note: the eDrawings download of the chassis contains a self executable viewer application.
Hopefully the detailed professional chassis design will give you ideas on how to design and create your own chassis. An idea of the size of the chassis design can also be obtained using the eDrawing. Best of Luck!
If you have any queries or comments, please email them to the author at: ![]()
Edit: A few people emailed me asking for the above Tony Kart in AutoCAD DWG Forma: PDF Format of Tony Kart | DWG Format of Tony Kart (in a Zip File) | STEP Format (in a Zip File)
The following website (http://www.vintagekarts.com/karts.htm) has some excellent photos and articles on old vintage go-karts. These karts were made using the basic necessities, and still achieved high speeds with excellent cornering and handling. Several ideas can be taken from these vintage karts where there were “no frills” to building gokarts. Ideas which can be combed from the gallery of photos include:


![]()
View more photos here: http://www.vintagekarts.com/gallery.htm
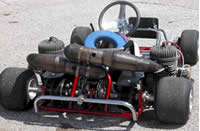 There are also some excellent in-depth articles about the history of karting, right up to the current day! Some of the topics discussed include:
Hopefully this website will provide further insight and details as to how simple engine powered gokarts were and can be made. If you would like your karting website reviewed and mentioned here, or if you have any comments on this or any other article, please contact the author by email at ![]()
 The following well produced video shows the stages involved in making a Go-Kart using the Dirt Devil kart plans. The stages shown in the video below are:
A lot of parts were taken from a quad and an other working go-kart! The suspension seems to work very well, however the camber angle on the front wheels seems too much. The front wheels are splayed out sidewards. Perhaps this is the suspension, but ideally this would need to be readjusted. Read more on camber angles here.
 The CIA (Commission Internationale de Karting) is the specialised Karting commission of the FIA, the governing body of world Motor Sport. The CIA oversees Karting safety in conjunction with the FIA and with a Research Group exclusively dedicated to Karting.
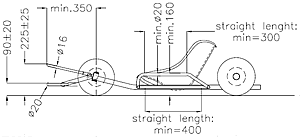
The CIA publish Technical Regulations for Karting, which includes detailed Drawings and specifications. In their most recent publication (2007), detailed drawings showing measurements and designs for Kart chassis are included.
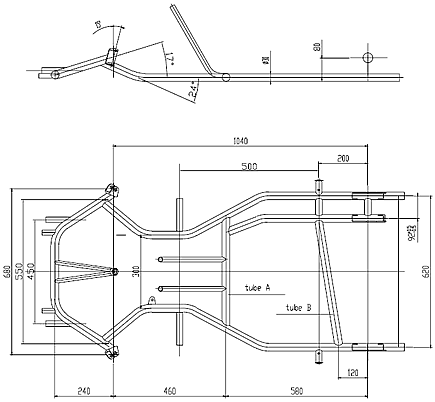
The drawing above shows actual sizes (metric also!!) of Karts and provide an excellent guide to building a Kart complete to regulation!! Many people, including myself develop free kart plans, and overlook the wealth of information and diagrams offered by Karting Authorities such as the CIA.
Original Reference Hyperlink to CIA’s 2007 Technical Regulations
Saved local copy of the CIA_2007_Technical_Kart_Regulations
Some more Drawings from the above Technical Regulations can be seen below:
There are three different factors when deciding on the Steering Geometry for Go-Karts. Those are:
This article covers the above three factors in relation to Go-Karts with no suspension, and outlines typical angles and geometry which should be used. The information for this article is taken from “The NatSKA Guide to Karts and Karting” and is currently available on ebay! The off-road kart plans, and racing kart plans on this website, take into account these steering geometry angles and match the values in the above Guide.
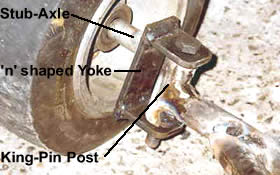 The (1) Stub-Axle, (2) n shaped Yoke, (3) King-Pin Post make up the essential parts of the steering.
The King-Pin Post is attached/welded to the chassis.
The n shaped Yoke pivots/hinges on the King-Pin Post.
The Stub-Axle is attached to the n shaped Yoke.
These three parts are welded/attached at various angles to make steering easier on a kart. The practical side/making of these parts are not discussed here, and instead just the theoretical setup.
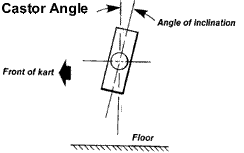 This is the inclination of the King Pin whose top leans in a backwards direction towards the rear of the kart. This is the most important factor governing how the kart will handle. This is however, interrelated with the other angles. In the case of the King Pin inclination, the greater the angle, the greater the “jacking effect” on the chassis, and the greater the oversteer the kart will develop. If there is too little, the kart will tend to understeer. The greater the angle, the heavier the steering and tendency to self-center. In practice, many people settle for angles between 20 and 25 degrees.
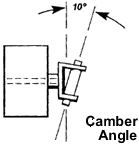 This is the inclination inwards at the top of the king pin towards the center of the kart, and it is aimed at counter-acting the jacking effect of the castor: at the same time it helps to produce a stronger joint, which will be able to withstand higher shearing forces. Generally this angle is between 10 degrees and 12 degrees, and to allow the wheels to stand flat on the floor, is offset by a similar angle on the stub axle.
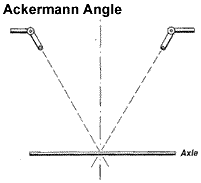 This refers to the placement of the steering arms (when viewed from above), in relation to the chassis, and the rear axle. Ideally, lines projected through the center of the King Pins, and through the bolts holding the track rods, should meet at the center point of the rear axle. The effect of this is that the inside wheel always describes a smaller radius arc than the other wheel, when the kart is being turned – this is most especially important at low speeds, and on tight corners. The length of the steering arm, in relation to the spade/drop arm, effects the “speed” of the steering reaction. A long steering arm causes slow but very light steering, whereas a short arm causes quick steering but requires greater effort.
Correct Placement/Arrangement of n shaped Yoke
 As can be seen from the following image, there are two possible arrangements of the n shaped Yoke. It can be attached to the chassis, or it can be attached to the stub axle (recommended). It is recommended that you attach the “King Pin Post” to the chassis, and that the n shaped yoke is attached to the front stub axle. This will make it easier if you are installing brakes on the front wheels. It also provides for greater clearance for the steering arm.
The problem with installing the n shaped Yoke on the chassis, is that when attempting to achieve “full steering lock” the steering arm hits off the n shaped Yoke. This was found on a previous kart and a notch had to be removed from the steering arm to allow for extra steering lock.
Conclusion
There does be a lot of debates regarding the ideal steering setup for karts, and especially when deciding on the actual angles to use for King Pin Inclination (KPI), Camber Angles and Castor Angles. All these angles are interrelated and allow for a Go-Kart with no suspension and a solid live rear axle to steer smoothly. If you have any comments, questions or queries about this article, feel free to email me: ![]()
EDIT: There is also an excellent article cover some of the above, and also toe-in and toe-out on Racing Cars (Formula 1 etc.) http://www.ozebiz.com.au/racetech/theory/align.html
EDIT: Another excellent article with interactive Flash Diagrams http://www.bcot1.com/karting/ (local)